


Megatree Details
See updated information at the bottom.
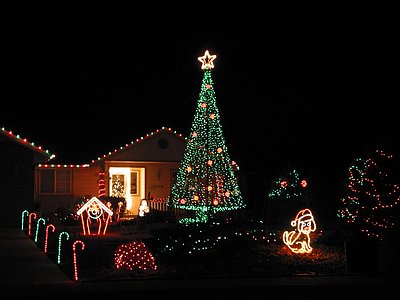
The Megatree is the sole focus of our yard.
The tree was made from a 21' galvanized 1 1/2" steel pipe (which is 1 7/8" O.D. and 1 5/8" I.D.). I cemented a 3' galvanized pipe nipple (that measured about 2 1/8" I.D. and 2 1/4" O.D.) in the ground with plenty of 1/2" rebar. It allows a little play which is fine since it's only real purpose is to keep the bottom of the pole from going anywhere. Since I didn't want the main pipe going down 3', I filled the sleeve with about a foot of cement (so the pipe would only go down about 2'). The diameter of the hole that I dug was about 2'...and I wouldn't go any less. As for the amount of concrete used, I used this handy concrete calculator. I only calculated a 2' x 2' hole. This kind of pipe is not available at Home Depot or Lowes. You need to get it at a building material supply center such as Fergusons or...in my case...Western Nevada Supply.
The rebar was pounded into two sides at the bottom of the
hole. I also pounded in rebar directly into the sides of the hole sticking
out. The goal was to get a little leverage from the ground if the tree
wanted to pull from side to side (which it wouldn't because it was guy wired).
I then put in the sleeve into the center of the hole and used a 3' level to
rough verify it was straight. Nothing was holding it up straight...just my
hand. Once I got it where I wanted it, I had my wife hold it while I
poured in about 8" of concrete. Then I checked for it being plumb
(straight)...making any corrections. Be sure to tamp down the concrete
around the sleeve to remove air voids and to just pack that concrete down.
Add concrete, check plumb, add concrete, check plumb, etc. Now, once I got
to about a foot to 8" to the surface, I just stopped and let the concrete dry
overnight, then I buried it with good dirt.
I put in 3 guy wire eye-hooks in cement about a foot-and-half down.
The tree topper and tree base are from Darryl Brown's plans.
I got the guy wire, turnbuckles, and pole clamps from Home Depot. I chose
not to get the 1/8" guy wire...I went the next size up...overkill, I know.
:) I figured the amount of guy wire needed by using Pythagorean's Theorem
(C2=A2+B2) and added another 20' onto that
(you'll need it for the guy wire clamps).
The 3-way wireframe star was made by Bill Foley (he did a great job!). Sadly, Bill passed away in 2012. His 3-way star will remain on my tree in tribute to his memory of being a creative decorating fanatic. You can purchase the 3-way stars from Darryl at www.christmaslightshow.com. I added
the ropelight myself.
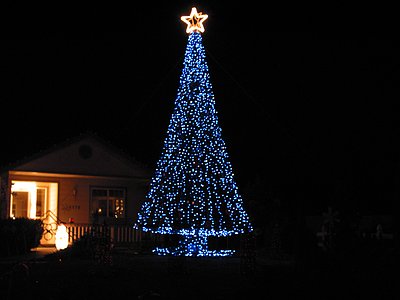
Here are the light stats:
12 slices of each color (white, green, blue)
Each colored slice consists of 3 strings of that color (i.e. 3 strings of white
for 1 white slice, 3 strings of green for 1 green slice, etc.)
Each colored slice was divided evenly (i.e. for one full slice, it went 1 string
of white, 1 string of green, 1 string of blue, 1 string of white, 1 string of
green, etc.) for a total of 9 strings per slice.
Total strings: 12 slices * 9 strings per slice = 108 strings * 100 lights per
string = 10,800 lights.
Strobes were put on a 40' long SPT-2 wire with female vampire plugs evenly
divided. 33 strobes were used. I suspended the middle of the SPT-2 wire from
near the top of the tree.
12 GE red super spheres were hung from the guy wires and strobe SPT-2 wire.
I used green gardening wire to hold the SPT-2 and sphere wire out to the shape
of the tree. It was connected to the guy wires.
Light-O-Rama information:
1 channel used for each colored slice: 36 channels for the slices
1 channel for the strobes
2 channels for the red spheres
3 channels for the 3-way star
Total channels: 42
The following information is provided to help others figure out how to put up a megatree of their own. I am NOT responsible for any damage or personal liability with the information contained within. It is your responsibility to practice safety and sound judgment. That being said, read on!
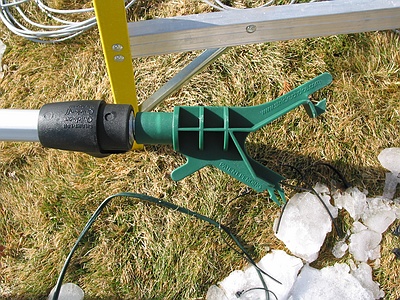
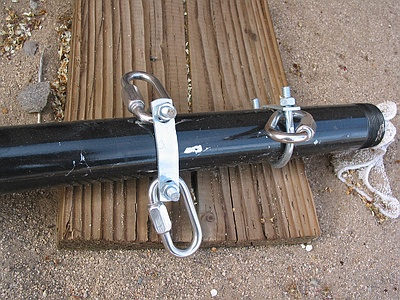
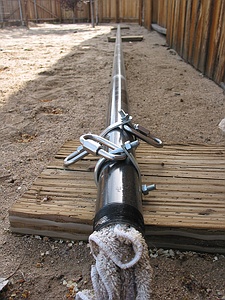
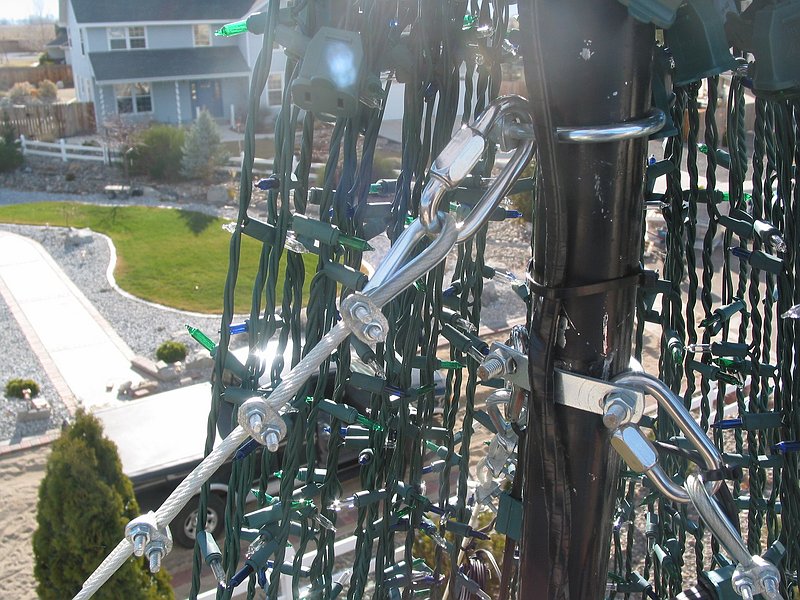
Picture of the guy wire connection to the ground with eye bolts and turn buckles. The turn buckles worked nicely to firm up all the guy wires. I had to re-adjust them after a week.
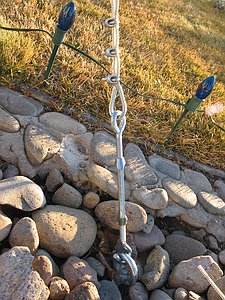
The guy wire eye bolts are easily hidden during the off season. I didn't covered this one up completely.
Word of warning! If you are going to make a Megatree, don't skimp on the guy wires or the connections (i.e. pole clamps, turn buckles, and eye bolts). Be sure the eye bolt is at least 10" long and uses a nut-washer-nut anchor (made and purchased at Home Depot) in 5000 psi cement. Also be sure you dig down at least a foot and a half. We have had crazy winds (70mph+ gusts) a week after the tree went up and I was happy to see it still standing. Winds are extremely powerful (just ask others whose trees have fallen). It is better to plan to be ultra strong than hearing a loud boom when the tree falls. I wouldn't skimp on not using concrete for the guy wire anchors.
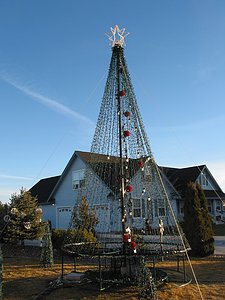
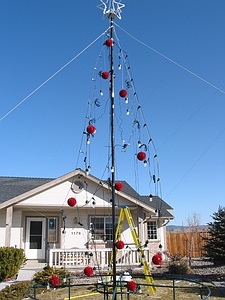
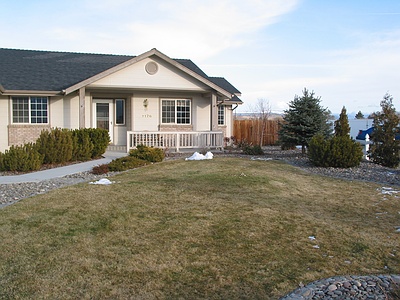
Here are some pictures of the tree during the daytime. Notice my LOR controllers inside of the tree base. About the biggest problem I had was the wind and rain knocking the strobes and spheres all over the place. I also had moisture buildup within the strobes even though I had holes drilled in the reflector. I found that if I drilled bigger holes, the condensation went away.
Once the pole was up, I put the strobe light string and the red spheres up. At this point, my wife thought I was making a "Nightmare Before Christmas Tree"...can't say I didn't blame her. The strobe string was centered and hung at the top on one of the guy wire connections. I used green gardening wire to hold the strobe string out from the center. You can't see all the ugly details of the inside of the tree at night...and once I put the outside strings on, it really hid the mess.
Taking the Megatree down goes a lot faster than putting it up. It took me 4 days to put the tree up and 2 days to take down. Putting one string up on the tree topper hooks at a time was painful. I had to use a ladder in addition to a painters pole with an adapter to hold the light string. It was windy and knocked the ladder over several times.
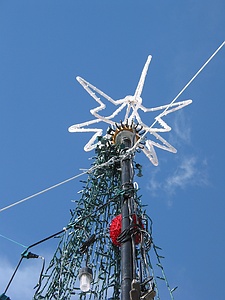
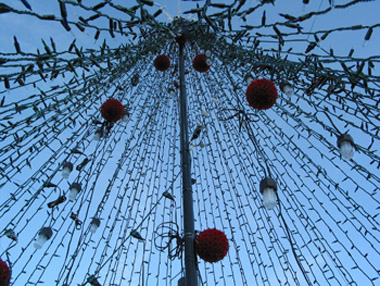
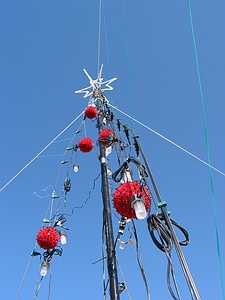
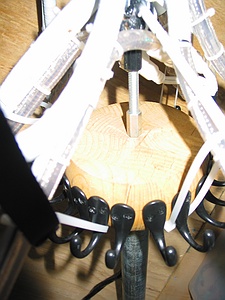
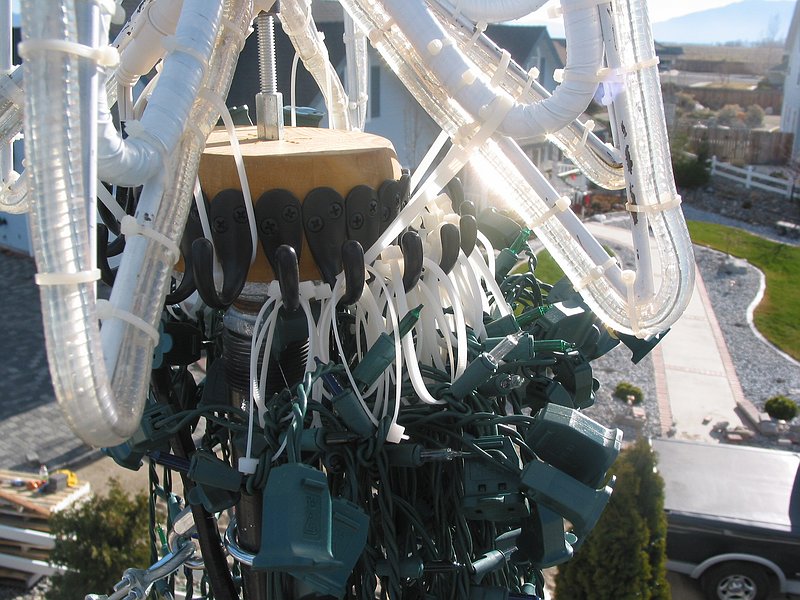
From this view, you can see all hooks up top and the 3-way star. The guy wires and the pole clamps can also be seen.
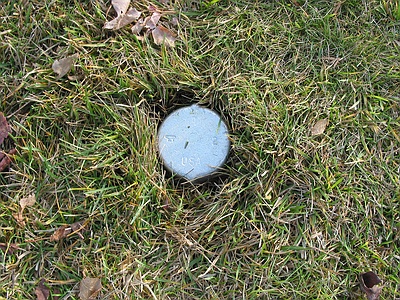
A great part about taking the tree down is that you can barely notice where it was up. No flag pole base or a bunch of concrete on the surface around the lawn. I dug down a little over 3' and put this 3' galvanized nipple sleeve in. I filled the hole with rebar driven into the sides of the hole at all different angles and filled the hole with 5000 psi concrete to about 10" below the lawn surface. That way the lawn can still have the soil and moisture it needs. This picture is what the cap looks like right after you put it on. The grass will grow around and over it.
Can't see the cap sleeve from a close distance. The location is actually the greenest part of the lawn in this picture.
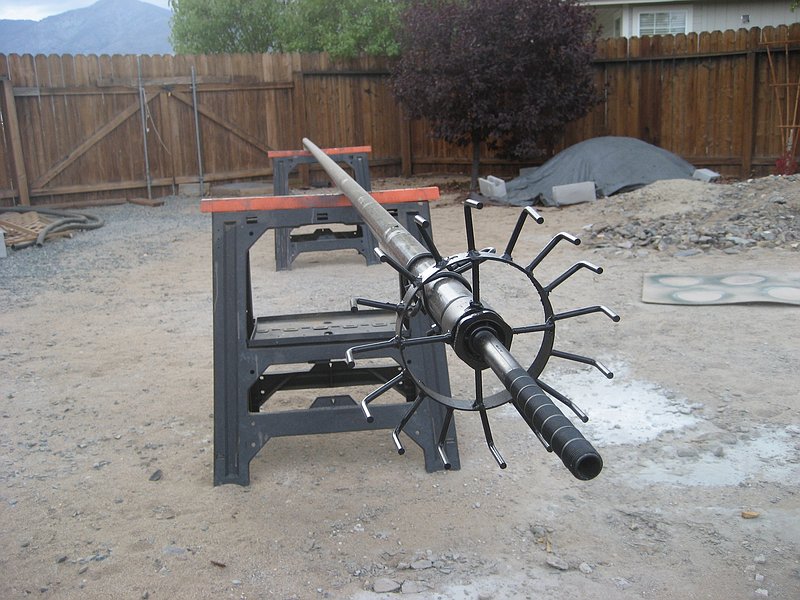
The tree topper is made from Darryl Brown's tree topper plans. I had to make a few modifications for it to work on my setup. I chose to go with galvanized pipe throughout. There is immense pressure on the tree topper from all the weight of the lights and 3-way star. In the picture above you can see where I was attaching the lights to one side of the topper. If I had used PVC, I could have broken the topper.
The wind was also a big worry for me. A week after I put the tree up, we had 70+ mph winds. It was blowing the strings so hard that it actually lifted the entire tree base slamming it against the pole, bashing the red spheres and strobes into the pole, and moved the strings to the other side of the tree (even disconnecting many of them). In addition, the tree base was falling apart. The PVC snap on connections were dislodging. There I was sweating it out watching my tree get destroyed at 2:00AM. So what I did do? Ran out in the wind and rain of course! I zip tied all the snap on connections to where they where supposed to connect to, hooked up wire to the strobe string and attached it to the base, got 4 cinder blocks and zip tied them to the outside bottom edge of the base. The tree was still a wreck, but at least I stop any further damage. The good news is the the pole didn't budge...thanks to the guy wires (otherwise, the tree would have collapsed). Believe it or not, the wind was still strong enough to lift the cinder blocks...wow.
The next day, I went through damage control, put all the light strings where they were supposed to go, and duct taped the outside top ring. It took quite a while to get all the strings in their correct order and location.
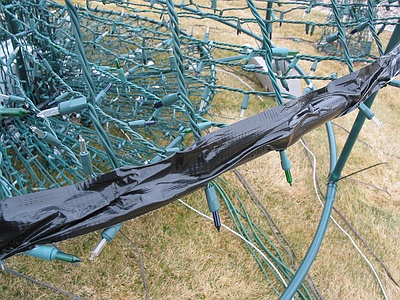
Taped the outside ring, zip tied the PVC snap on connectors and added cinder blocks. Whew!
Megatree build order tips:
I found that there is definitely a sequence to putting a megatree up. You can't put up the pole with the tree base built and in it's final position. The pole is heavy (especially with the tree topper, star, cables, etc. on it) and can't be lifted by yourself. It is my advice to have at LEAST 2 strong adults lifting it in place. I had my wife and I putting it up and taking it down. Each time, it nearly got out of control and could have hurt someone/something (including the megatree itself). Here is the order in which I setup my megatree:
1. Put the 2 octagon rings and 2 waterpipe rings from the tree base on the ground around sleeve. After all, once the pole is up, the only way to get these in the proper position is to lift them over the top of the pole (since they are glued or fastened together). At 19' up, that wouldn't be fun.
2. Attach cables and clamps to post. I put my clamps about a foot down from the top of the pole and attached my cables to them using a quick links that could handle 500 lbs. I purchased the pole clamps and quick links both at Home Depot. A hacksaw was used to cut the excess ends of the pole clamps off. I always overbuild each project...that way I can sleep better at night.
3. Affix star to top of tree topper. I just didn't depend upon the center threaded mounting to keep my star attached to the tree topper. I also zip tied each bottom part of the star to the tree topper hooks. If I didn't do this, I'm sure the star would have easily fallen off from wind or put moving it around when putting the lights on.
4. Slide tree topper onto top of post. There is nothing to attach the topper to the pole. Gravity and the weight of the lights make sure it is going nowhere.
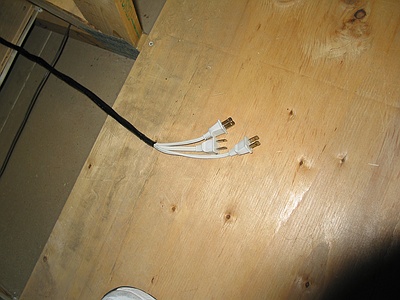
5. Run extension cords down from star to base of post. Best to do it now while it is on the ground than 19' up. Zip tie the extension cords to the pole, but not too close the bottom part.
6. Lift post and slide into sleeve in the ground (use cables if necessary). Again, at least 2 strong adults are needed here. In my case, both of us were on the ground. My wife was to hold the bottom part of the pole down and position it in the sleeve hole. I was to lift it and follow up closer to push it up in the air. Remember, this is really a physics problem. The closer you get to the hole (lifting it), the heavier it is going to get in addition to the bottom of the pole wanting to lift upwards. It is VERY heavy and unstable when you get closer to the sleeve hole. We ended up missing the sleeve hole and had the pole sitting on the grass. We both had to lift it straight up, position it, and slide it down. Don't use a ladder to lift the pole up, unless you want the ladder to fall with you and the pole on it. It was not a fun experience and I hope to find a better way to do this next year (possibly using the cables that are attached to the top).
7. Attach cables to tie down eye bolts and tighten. First, I opened the turn buckles as far as they would go, then I brought each of my cables to the eye bolts and estimated where I would have my cable loop and fasteners (all bought at Home Depot). Then I put my cable loop & fasteners on. Once all 3 cables were complete, I hooked each one to the turn buckles/eye bolts and tightened down the turn buckles on each. If you tightened the turn buckles all the way and you still have any kind of slack, then you made the cable too long....try again! Just don't cut the ends of the cables. I just left mine nicely wrapped at the eyebolts.
8. Attach strobes and red decoration balls to cables. I attached a ladder with rope to the pole and CAREFULLY and SLOWLY climbed up. I then took the center of the strobe string and zip tied it to one of the quick links. I then used the green wire (mentioned above) and brought the strobe string out to fill the tree by attaching it to the guy wires. Afterwards, the red decoration balls were attached to the strobe string and the pole itself (3 to be exact). When putting the strobe string up, keep in mind that it is heavy. The weight will stress the SPT-2 wire of the strobe string, but shouldn't break it. When climbing the ladder, you will notice the pole flexing...YIKES! Be careful to not bounce on the ladder too much...I'm not sure of the pressure that the pole can take before folding in half and have you going to the hospital along with a megatree project that ended.
9. Assemble base around post. You can now assemble the tree base easily. The big rings will need to be put together around the pole, but under the guy wires.
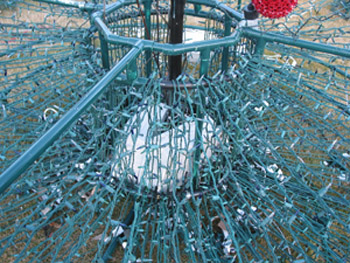
10. Put the LOR boxes in the center of the tree base. It is going to be rather tight, but it will work. Put the extension cords to the LOR boxes underneath the tree base.
11. Hook up lights to tree topper and use re-useable zip ties to keep lights steady. This is the longest part of the whole thing. I initially put up one string color at the time (green) for the first half of the tree and didn't fasten them down until this point....that was a MAJOR mistake. Strings were all tangled up and ones that were attached to the tree topper in the front were getting attached to the back of the tree. What a mess. It took hours to fix everything. I then came up with a better method. I found that if I only hooked up a slice at a time (green, blue, white, green, blue, white, green, blue white) and totally attached them down to the tree base using the re-useable zip ties, that it went much smoother with minimal tangles. You could even hook up half of a slice at a time. I did the full slice because it was a pain getting off of the ladder, moving the ladder, getting inside the tree base, and wrapping the light strings to the base. Getting up and down the ladder to get a new string of lights was very time consuming in itself since I had to take the painters pole up and down with me each time. So, I attached a storage container to the top of the ladder and put a full slice of lights in it. As you get around the tree, it will get VERY tight to get into the tree base area with the red decoration balls hitting your head and no space to attach the light strings to the base. Patience works here. All in all, there has to be a better way of doing it. I think the ultimate way would to be at top on a cherry-picker rented from Home Depot ($190/day) and having someone below attaching the lights to the tree base. Expensive? Yes, but after spending 3 full days doing this, it may be worth it. Don't know. I'll consider that for next year.
12. Hook all lights to LOR boxes. Great! You have all your lights on and ready to plug them in. If you made your LOR boxes correctly, the ends of each extension cable will be labeled so you know which channel is which. I plugged 3 strings of an individual color into one channel. Obviously, the programming and layout of your tree is critical here. Also hooked up the tree star in the correct order (test each by plugging them in directly to power to determine). The strobes and red decorations were also plugged in. It is a BUNCH of wires and extensions.
13. Wind-proof your megatree. This is an optional step, but found it necessary for me. I attached the 4 cinder blocks around the tree base and zip tied each of the snap on tee's. Use black duct tape to tape around top ring of base to stop the lights from moving around. I also attached more of that green wire to the red decoration balls and attached them to the base and pole. The red decoration balls were otherwise, bashing into things (the pole, strobes, etc.) during the winds.
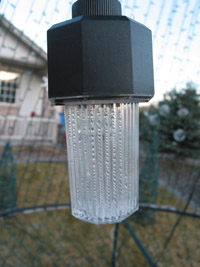
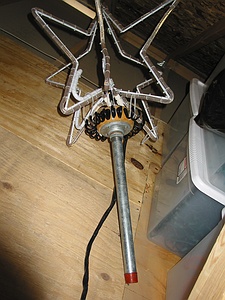
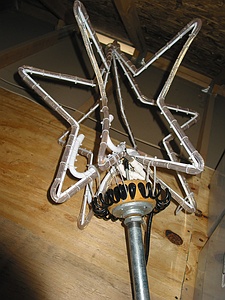
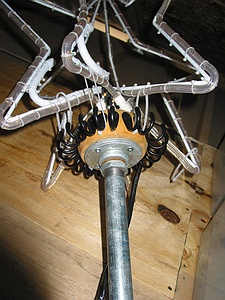
Here are pictures of the 3-way star and tree topper. Had to take these pictures up in the attic since I already put the star away for the year. The star was made to attach to the tree topper, but wouldn't be strong enough for the heavy winds, so I zip tied the star around to the tree topper hooks. I wrapped the power connections together with electrical tape so they would be concealed at the top of the tree. The tree topper was put together from Darryl Brown's plans. I got the hooks from Lowes. I found that the hooks are thinner than what Darryl's plans have, so I had to add 5 more. The ropelight around the wireframe star was easy to put on with zip ties. The ropelight had to be cut at a specific spot and I ended with more ropelight than I wanted, so I wrapped that part in white electrical tape.
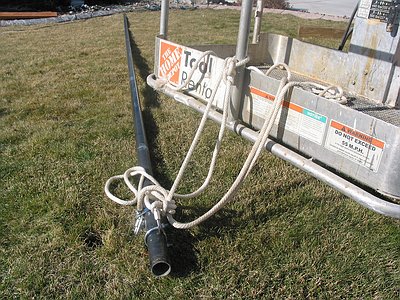
Pole storage during the off-season. No need to keep
indoors. I put a rag in the ends to stop the critters from crawling in.
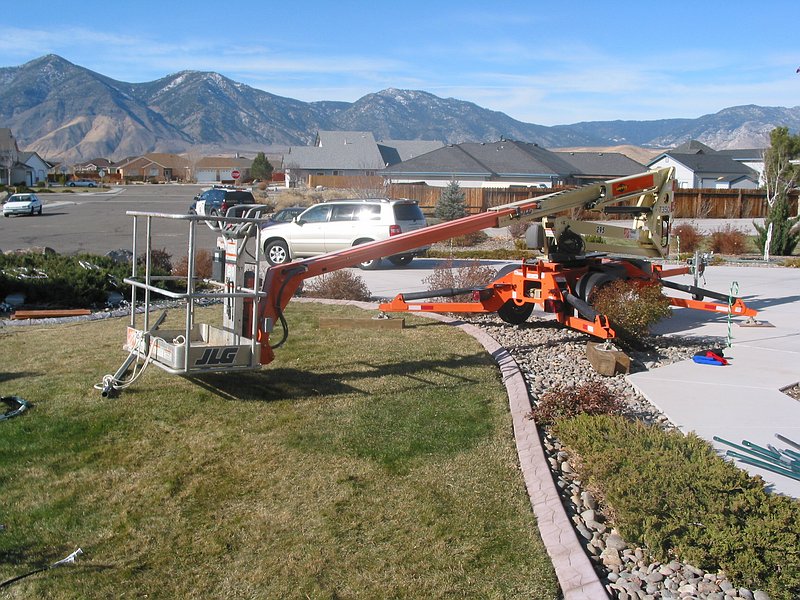
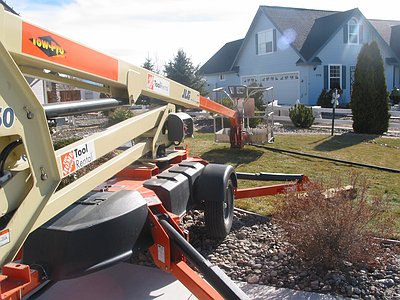
Well, I put the Megatree up this year in 2 half days instead of 4 full days. "How?" you ask. Well, using a lift from Home Depot Tool Rentals. Instead of barely lifting the pole by hand (and having it crash down), I simply tied the pole to the lift and lifted the pole into position. No struggling. No danger. No sweat.
The lift self leveled since I had it on un-even ground. I put down some boards so it wouldn't destroy my concrete curbing around the lawn as well as getting a firm area on top of the rocks. I put plywood down on the driveway so it wouldn't make marks. Next time, instead of 6x6's, I would have to use something wider. It would have been a nasty visit to the hospital...or morgue if the the 6x6's slipped out from under the feet. In my case, they held solidly, but not so sure I would do the same next time.
I took a few pictures from up high, until I got the willies and brought myself down. :)
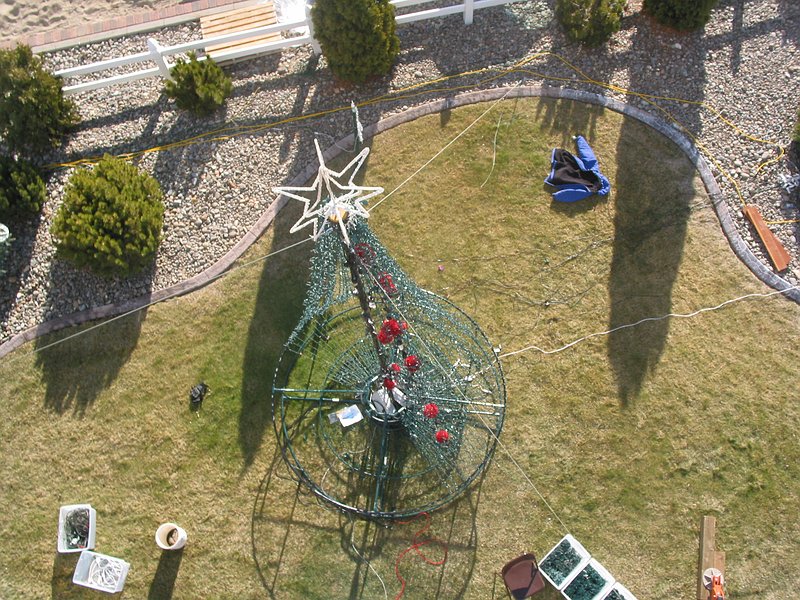
I was also able to get pictures of the upper part of the tree.
After taking 2007 off for a much needed break, I found a few items that needed to be fixed on the Megatree. First off, my bun foot of three years was cracking from the weather...even though I water proofed it. It needed to be replaced with another bun foot or replaced with something else. I chose to go with something else. Let's face it....bun foots were NOT created to be outside, withstand a couple hundred pounds of wires attached to it, or have a 3D star affixed to the top. Putting up a bun foot is eventual disaster. It's not a matter of IF, it's a matter of WHEN? Darryl Brown (at www.christmaslightshow.com) found someone to create steel tree toppers that can withstand the weather and are priced right (about $30). So I got one and am pretty impressed. The topper screws in directly to the top of the 1 1/2" pole.
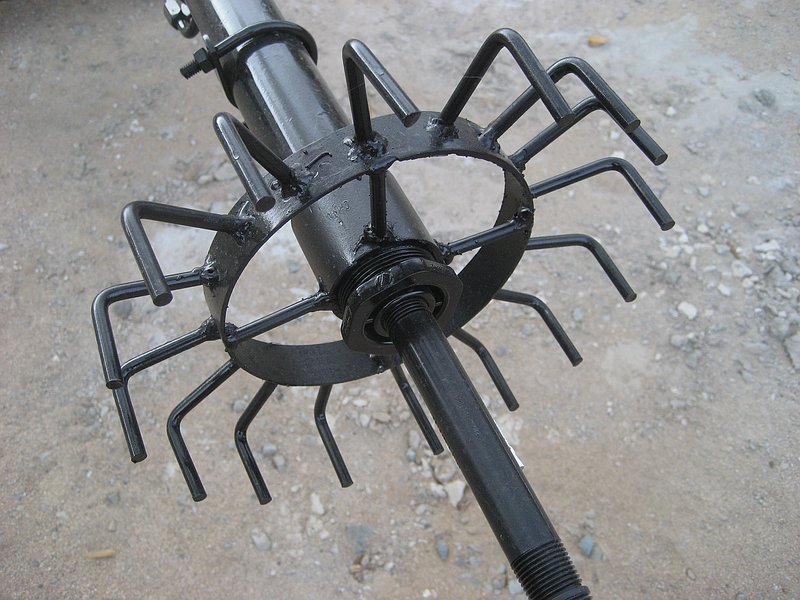
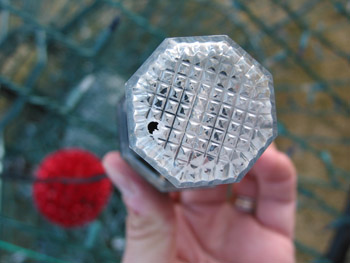
The topper comes with a PVC reducer at the top that I painted black with Spraypaint for plastic. This protects the PVC from the sun which will otherwise make it brittle and turn yellow. Additionally, I didn't want to see it stand out too much in the daylight. I put in a sprinkler pipe into the top before I spray painted to prevent any paint on the inside threads. This is where you screw in your 3D star. I'm going to have a metal 1/2" pipe welded to the bottom of my 3D star support so I can simply screw it in.
Some of the hooks were VERY sharp and needed to be filed down to prevent any cuts in the wires. I then repainted the ends to prevent any rusting. Speaking of hooks, it has less of them than the 20 or 21 I had with my bun foot, but the hooks are longer and taller. I like this topper. I can only see two improvements that I would make. 1) Add a couple more hooks. Even alternate them with 2 levels if needed to allow all the strings to attach. 2) Re-inforce the 4 bars going to the center coupler.
After giving the topper a full test with 75+ mph winds, it worked beautifully! My megatree is holding up to look exactly like it was prior to multiple days of big winds. So, I'm pretty happy with the topper and recommend it to others who have bun foots...or considering bun foots.